Everything You Need To Know About Creating A Contractor Facebook Business Page
Aug 16, 2024
Facebook is the largest, most active, most popular social media network on the web. With a user base of more than 3 billion daily users and diverse demographics, 200 million small businesses turn to it as their go-to advertising and outreach platform. If you’re looking to create (or update) a Facebook page for your service business , here’s a guide that will help you get the most out of it without a headache. This guide will explore everything from account types to administration and show you how to set up an account that will generate amazing leads that turn into customers.
Step 1: How to Create a Business Page
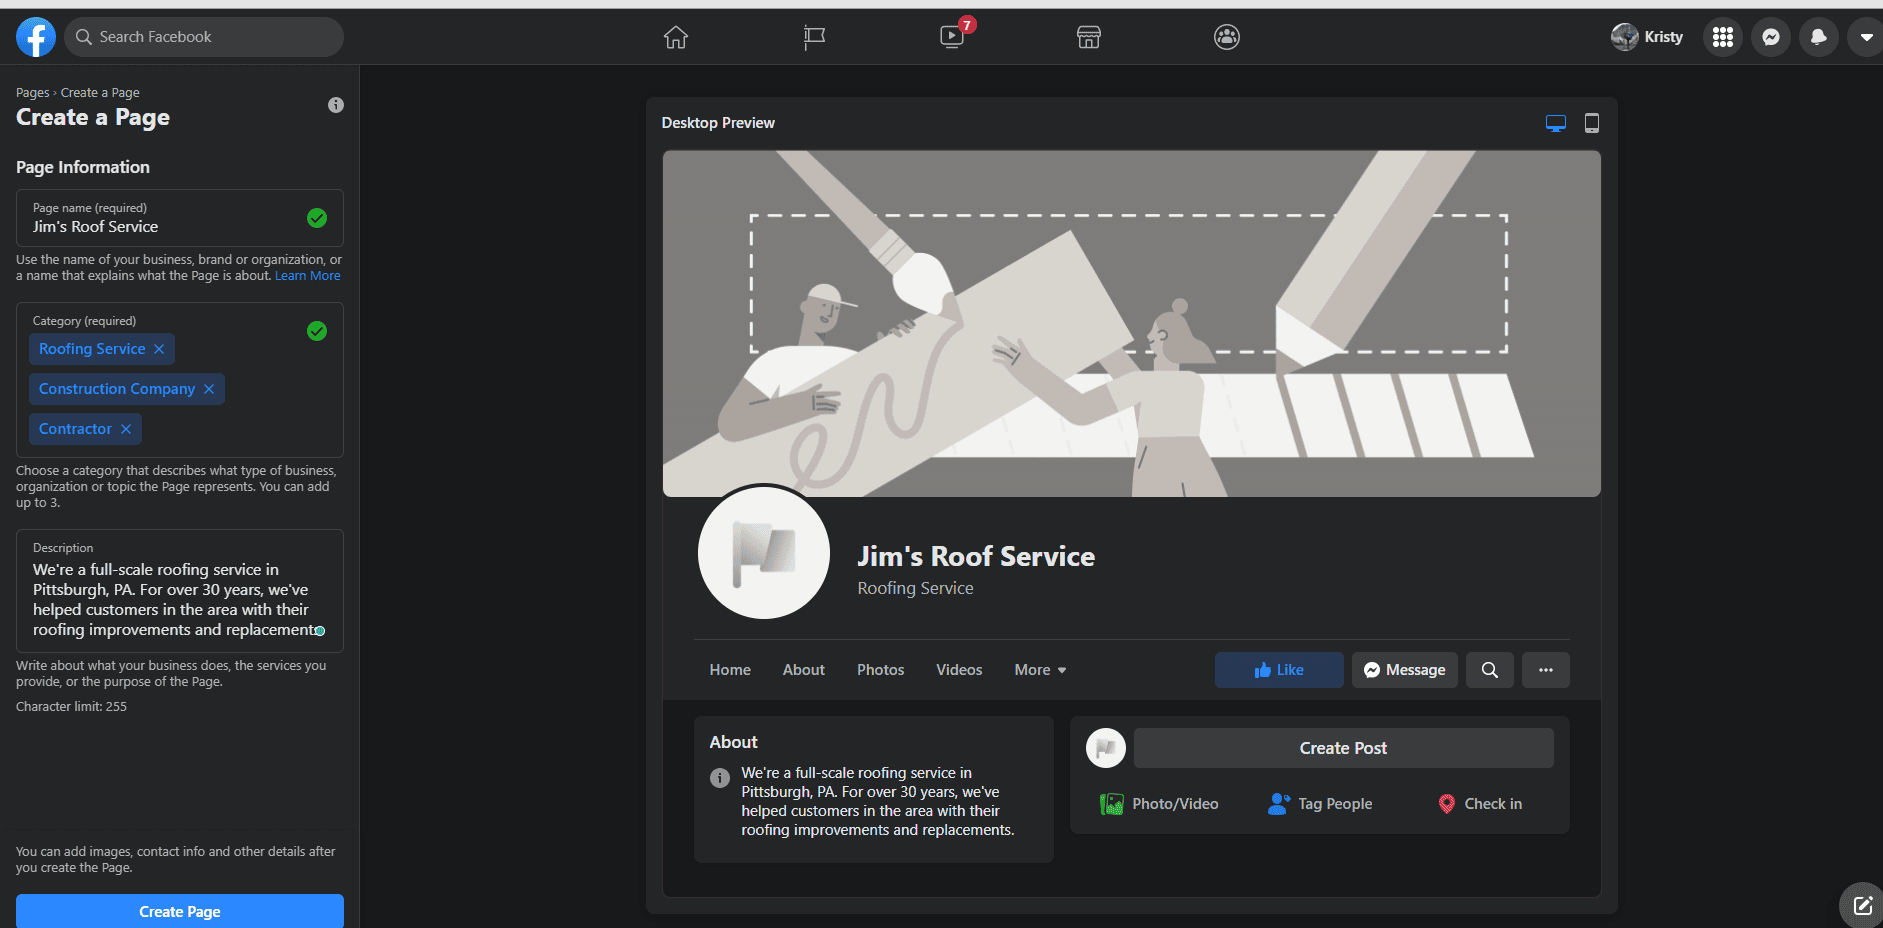
Before you create a Facebook page, make sure you understand how your business fits into the categories on Facebook. Many small business owners create the wrong kind of business account, or even a personal account, and end up severely limiting their own reach by mistake. By selecting the right category Facebook will work for you, not against you.
To start, you'll want to be signed in to your personal Facebook account, and then click the "Create a Page." From there, you can either click the "Pages" option in the lefthand sidebar of your home screen and the "Create a Page" button. Or to make things simple, just click this link.
First thing's first, you'll need a name. Use the name of your business, not your personal name or a nickname. You want to look professional, after all.
Next comes selecting the correct category. You can choose up to three that represent your type of business. Facebook used to be pretty limiting with these categories, but now you'll likely be able to find something very specific for your page. Some of the common ones services businesses might choose include:
- Plumbing Service
- Water Treatment Service
- Sewer Service
- Local Service
- Electrician
- Contractor
- Masonry Contractor
- Concrete Contractor
- Kitchen & Bath Contractor
- Fence & Gate Contractor
- Cleaning Service
- Gutter Cleaning Service
- Roofing Service
- Construction Company
There are many more as well. You can search for them by typing in the "Category (required" box — Facebook will provide automated search results as you type.
The last step in creating a new business page is coming up with a company description. Writing an informative company description is an important part of engaging customers. You only have 255 characters in this section, so keep it short and sweet. Don't worry — you'll have more room to talk about your business later on in the page creation process.
Ready to go? Just hit "Create Page" at the bottom, and your page will be official!
Step 2: Filling Out Your Page
When creating a Facebook page for a business, keep two objectives in mind: including the right information for online search and encouraging customers to contact you through your page. Many businesses will achieve one of those objectives, only to fail at the other. By doing both, you’ll generate better leads with less effort.
As that relates to filling out a Facebook page, make sure to fill out everything. Businesses without profile pictures, public phone numbers, background information, and at least a handful of posts each week don’t generate leads on Facebook. An incomplete Facebook page is like a half-written sales pitch; it won’t close any deals. Here are the relevant sections you should check out.
Profile Picture and Cover Photo
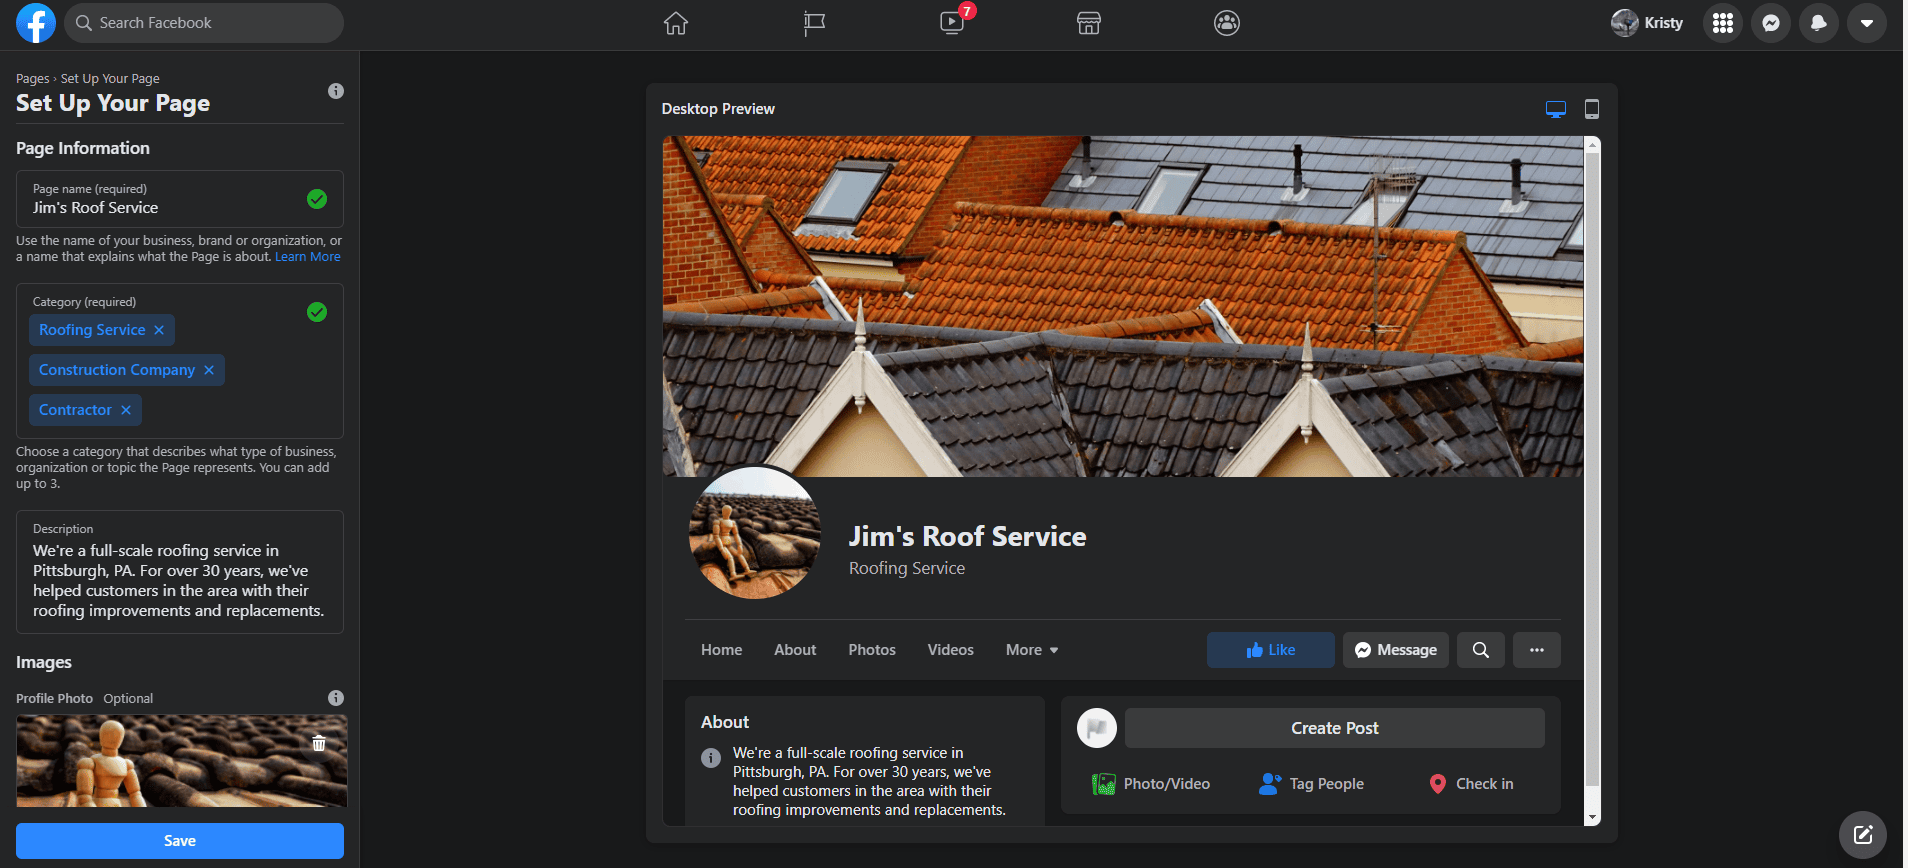
Facebook is very visual, meaning that a good profile picture and cover photo can go a long way in making a good impression. According to Facebook, a profile picture displays at 170x170 pixels on a computer and 128x128 pixels on a smartphone. So you'll want to have a square image with a decent resolution so it doesn't get cropped or stretched out.
A cover photo is bigger. It's a rectangle and displays at 820x312 pixels on a computer and 640x360 pixels on a smartphone. Facebook recommends you upload a picture exactly 851x315 pixels for the best loading times.
When you're done uploading these files, just click "Save" to move to the next step!
Connecting WhatsApp
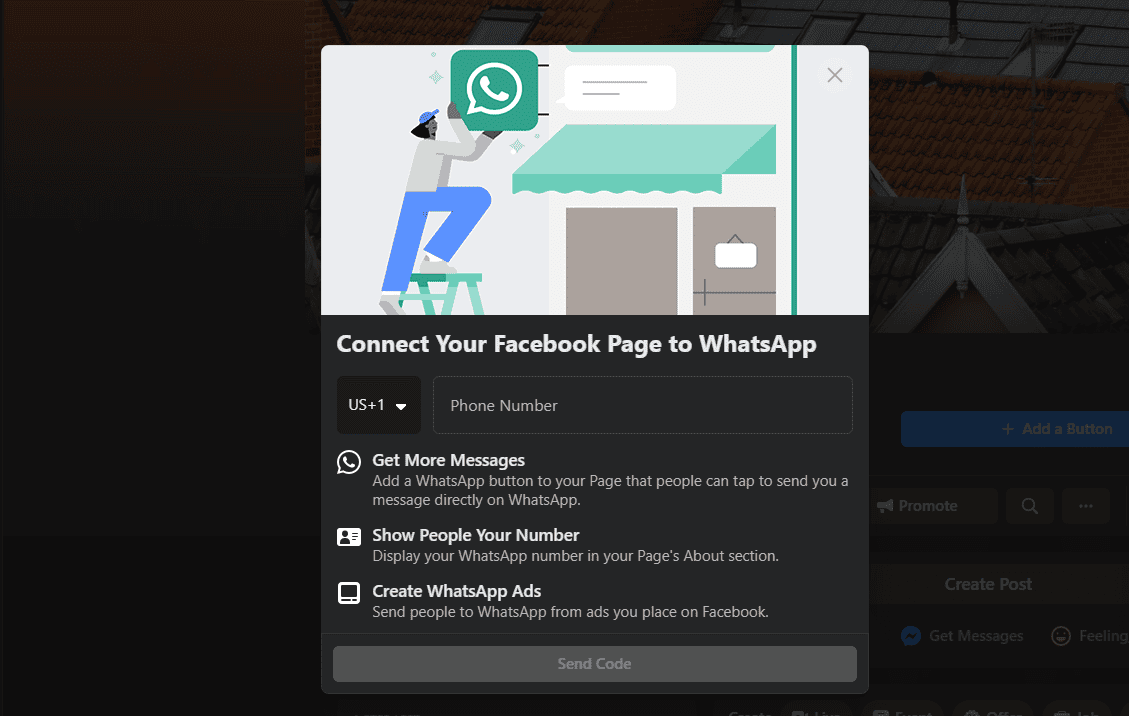
Another feature Facebook might try to get you to dabble in is WhatsApp. Facebook bought the chat service back in 2014 and has started integrating it into its website. After uploading your photos, you'll be prompted to add your phone number to the page.
Doing so is optional, but it can make it easier for you to connect with users who use the app for sending texts. To get it working, all you'll need to do is type in the verification code Facebook will send to your phone.
Provide Info and Preferences
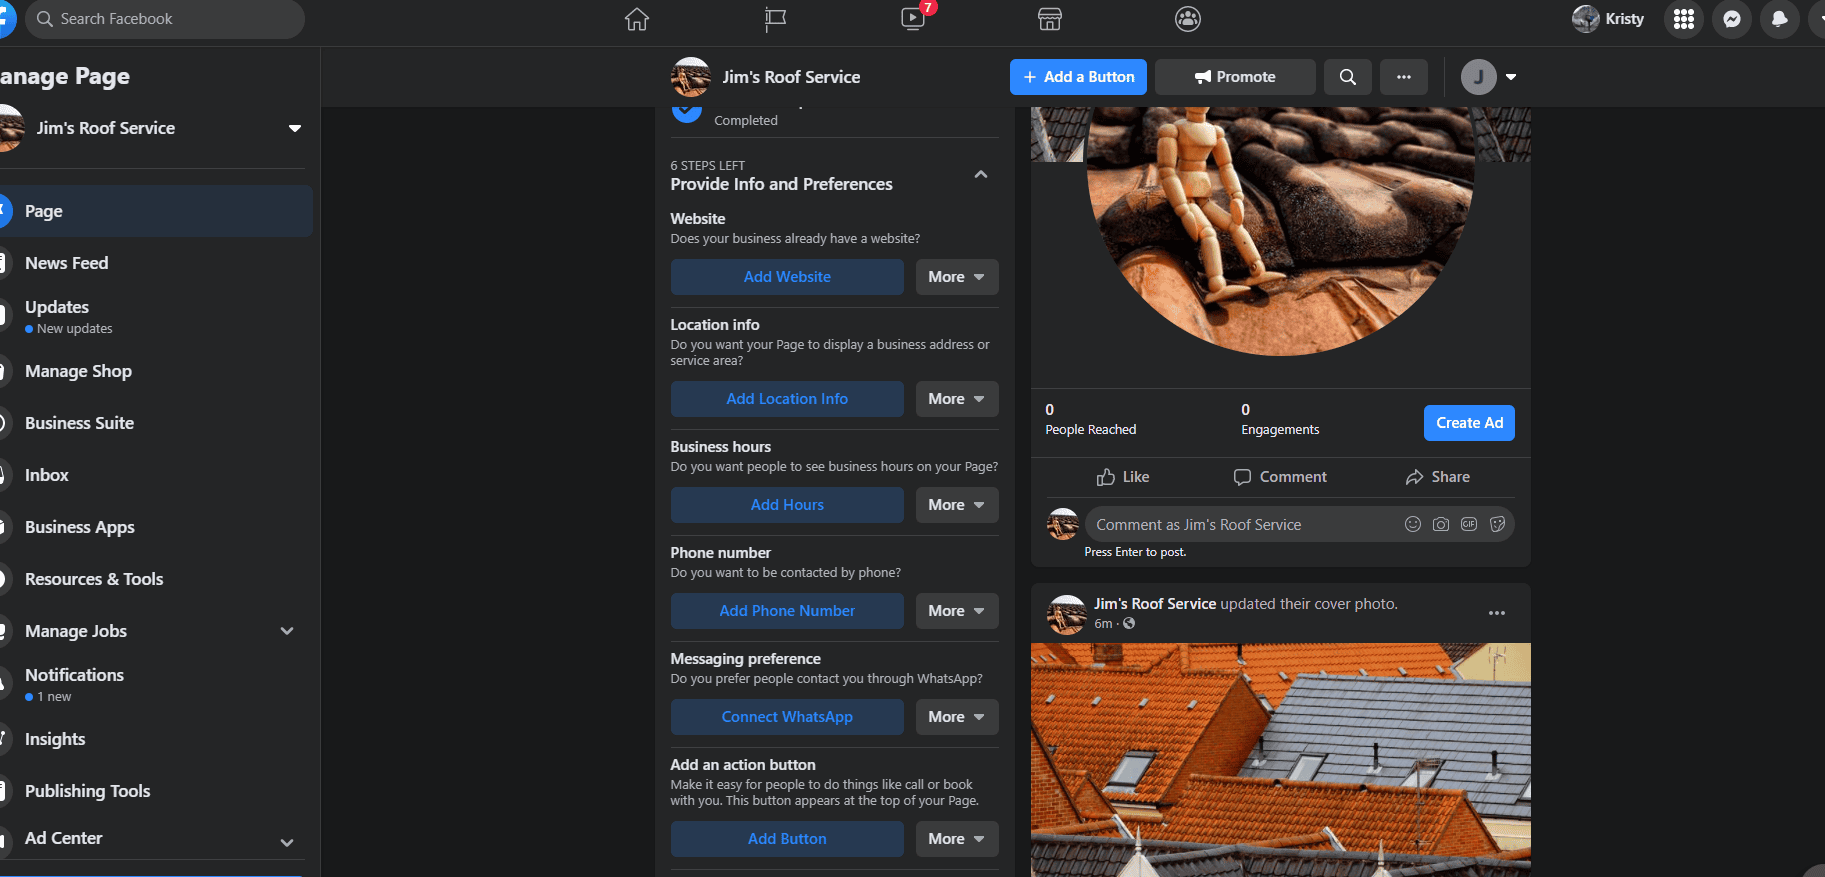
After deciding "yay" or "nay" on WhatsApp, you'll see a checklist for tasks you can complete to finish your page. These include:
- Adding your website. Giving people your website allows them to find out way more about your business.
- Adding your location. Many small businesses that don’t have a storefront omit address information, but doing so can be bad for business. Facebook uses location data to connect potential customers with businesses in their area. By including the address of your office or dispatch center, customers will find you easily in search. This can also help with Google search rankings.
- Adding your business hours. No one likes leaving a voicemail. List the hours during which someone will be available to take a call and schedule an appointment. This field is most important for businesses that deal with foot traffic and on-site sales, but it shouldn’t be neglected by appointment-only businesses. Customers are more likely to call if they know someone will be on the other end of the phone.
- Adding your phone number. Without contact information, how can a business reach customers? It’s important to list a phone number that’s used only for the business and not the contact information of an individual who works for the business. Many small businesses use Google Voice and call forwarding to make sure individual privacy is respected.
- Adding your message preferences. This is where you'll specify if you want people to contact you through WhatsApp or Facebook Messenger.
- Adding an action button. This lets customers call you directly or schedule an appointment. The benefit this button provides is massive, increasing click-through rates by over 200%. For small businesses, this is an amazing benefit provided at absolutely no cost. Used properly, this can be one of the most important parts of a business page. Facebook lets you track the number of times the button has been pressed, and it will provide demographic information about the people who click it. Used properly, this data can help you tweak your page.
Step 3: Understanding Page Tools
Once you’ve created a business page, filled in all of the relevant information, added pictures, added additional information, and set up your call to action (and made a few Facebook posts), you’ll be ready to handle the other side of managing a business page: using the page tools.
At first glance, the number of tools may seem daunting. It isn't a user-friendly interface with messaging features, insights, ad publishing, and all kinds of internal views, charts, lists, and spreadsheets. It takes time to figure out how to use these tools, and not all of them are relevant to every business owner.
Inbox
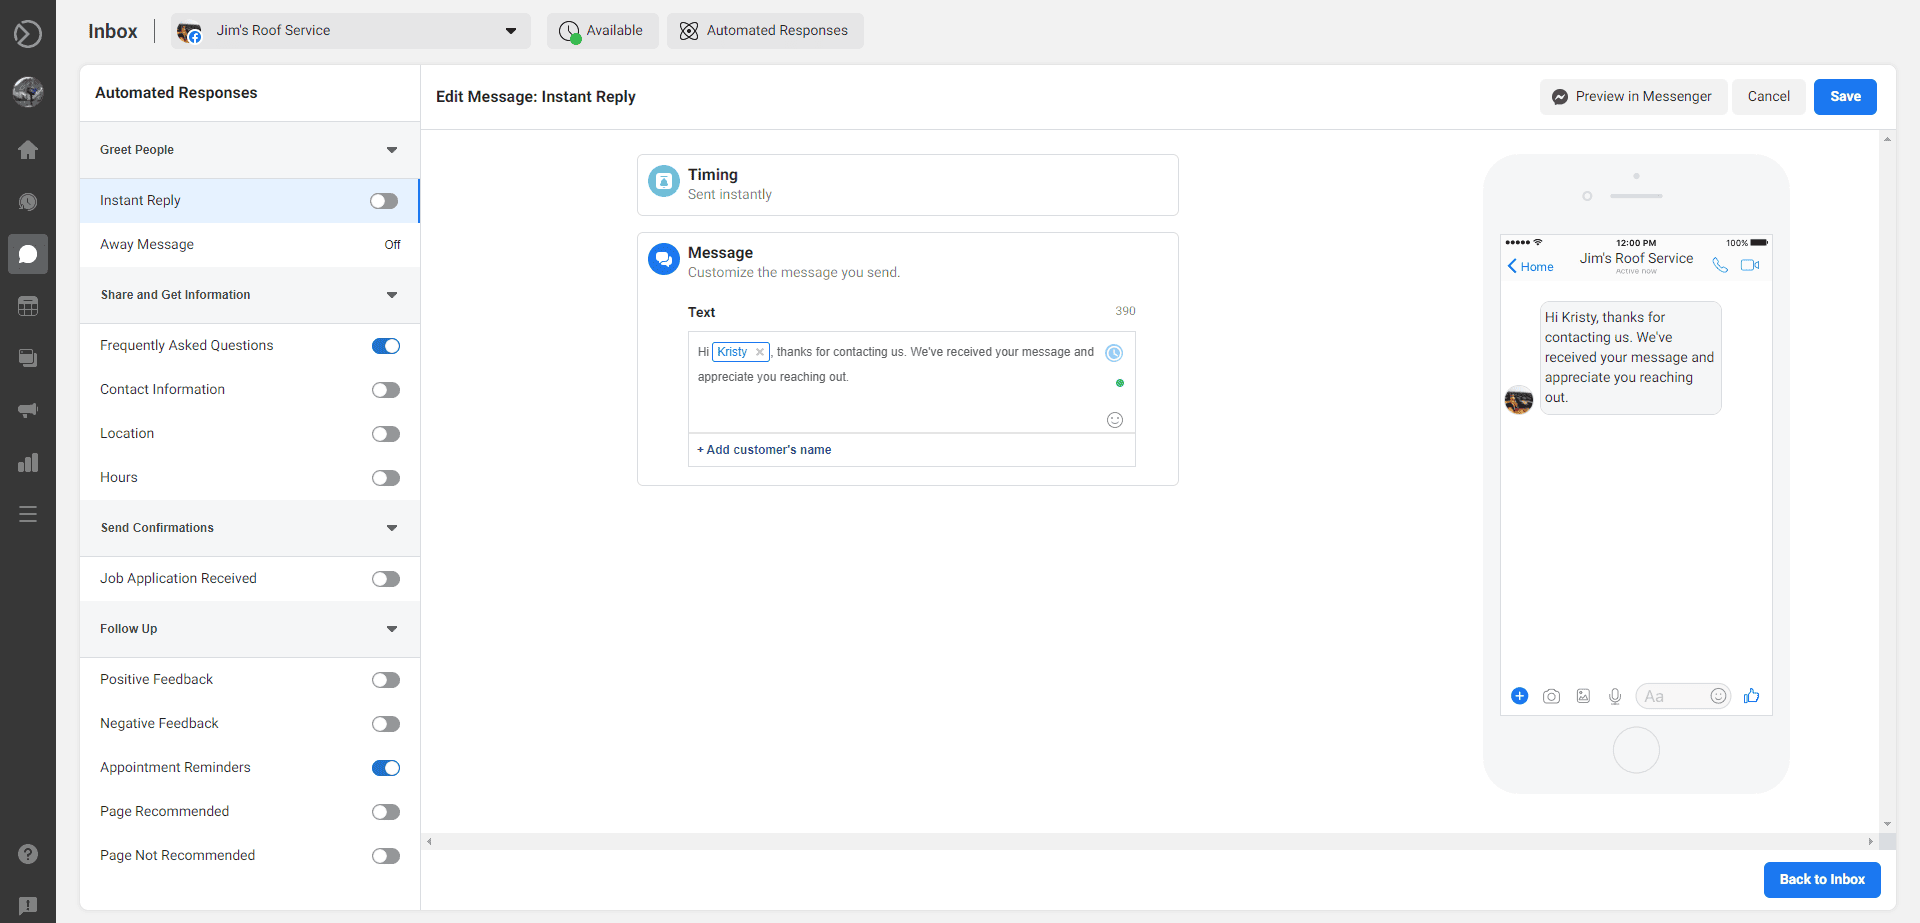
Many customers will contact businesses through Facebook directly instead of calling a phone number. Without the pressure of a phone call, Facebook messages are an easy way to answer quick questions and handle small issues. Businesses can set whether they’re available for messaging on the messaging page, and those that respond quickly to messages will receive a special badge on their page.
If you have the time or have an office employee who has the time, this page can be a powerful lead generator. It’s important, however, to maintain professionalism at all times while engaging with customers through Facebook messages.
If you don't have the time, you can set up Automated Responses that send out form messages to customers with questions. That way, they'll at least get some information while they wait for you to respond. To do this, click on the "Inbox" button on the left side of your screen, then "Automated Responses."
You can then customize the message (including adding in the shortcode for the sender's first name, last name, or full name. Just click "Save," and this message will automatically be sent out any time someone messages your page.
Insights
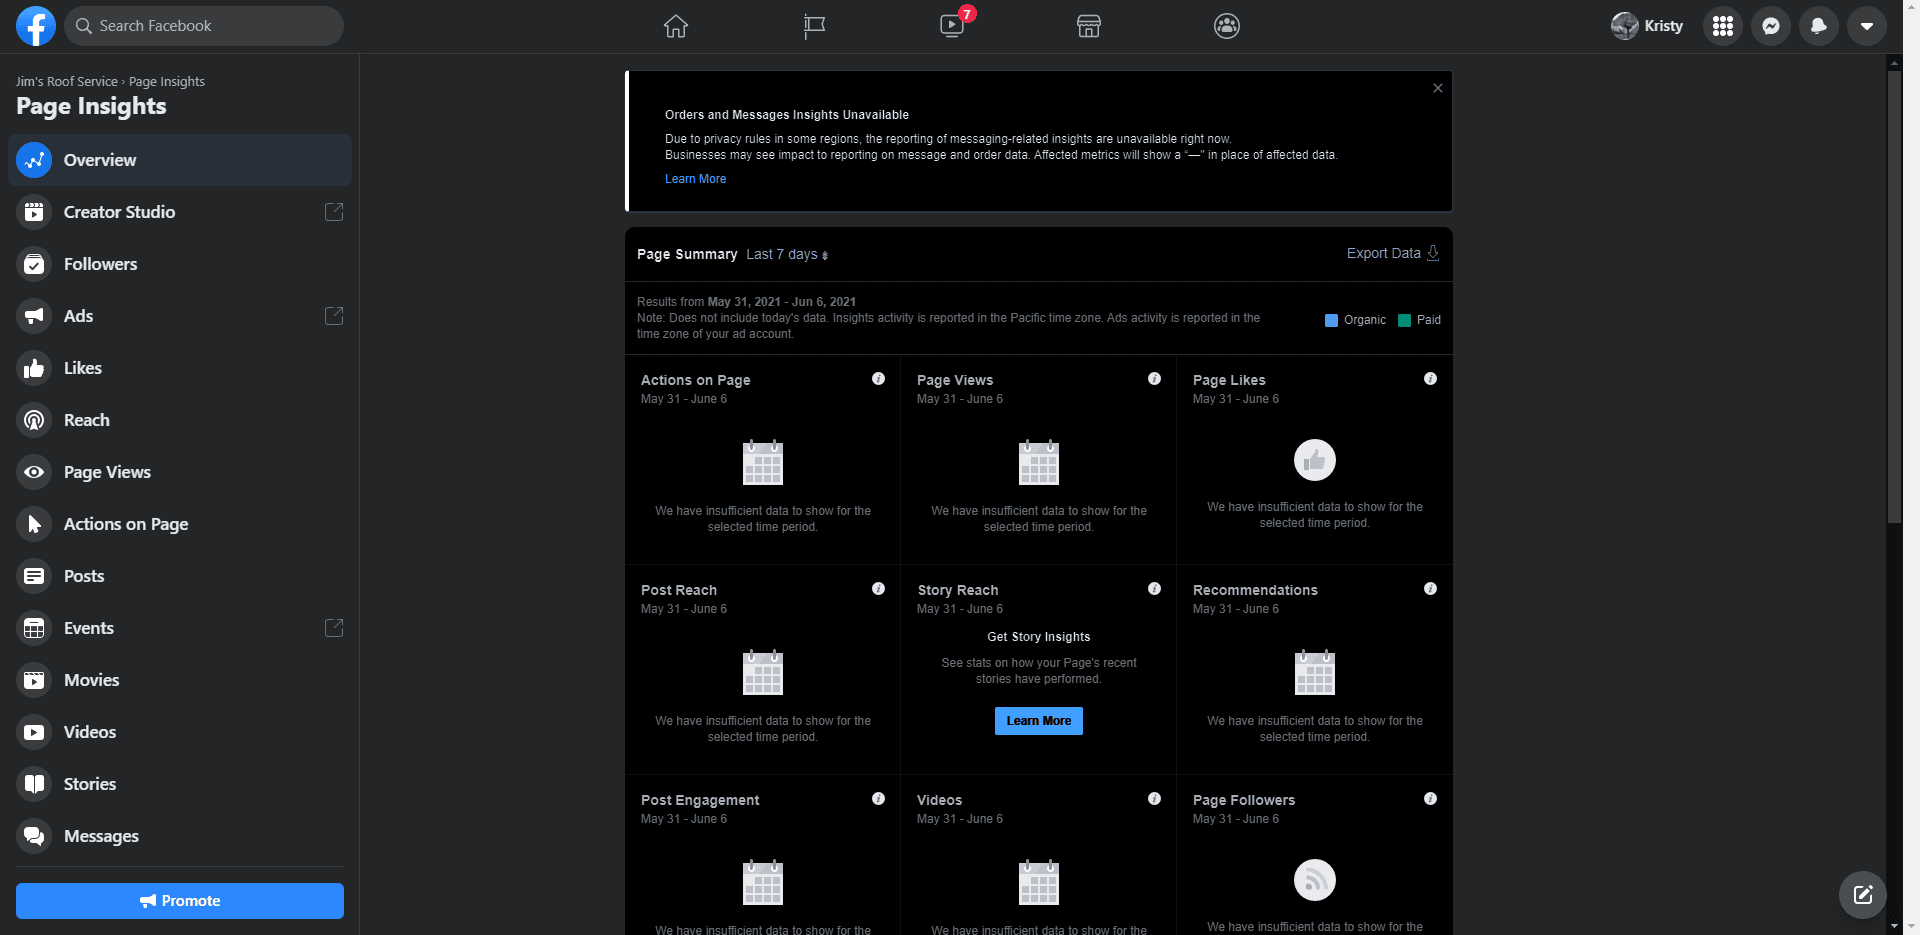
Facebook insights provide information about how and when customers visit, like, comment and engage with your Facebook page. Of all of the information displayed here, the most important things to track are audience size and actions on-page. Tracking promotions, likes and views can be situationally important for businesses, while tracking reach is significantly less so.
Actions on Page are important, as this will tell you where and when customers are clicking on your website, your phone number and your call to action, and similar page features. Combined with demographic data, this information will help you understand customer behavior. Whenever you tweak your page, tracking the information displayed here will help you assess the impact of those changes.
Publishing Tools
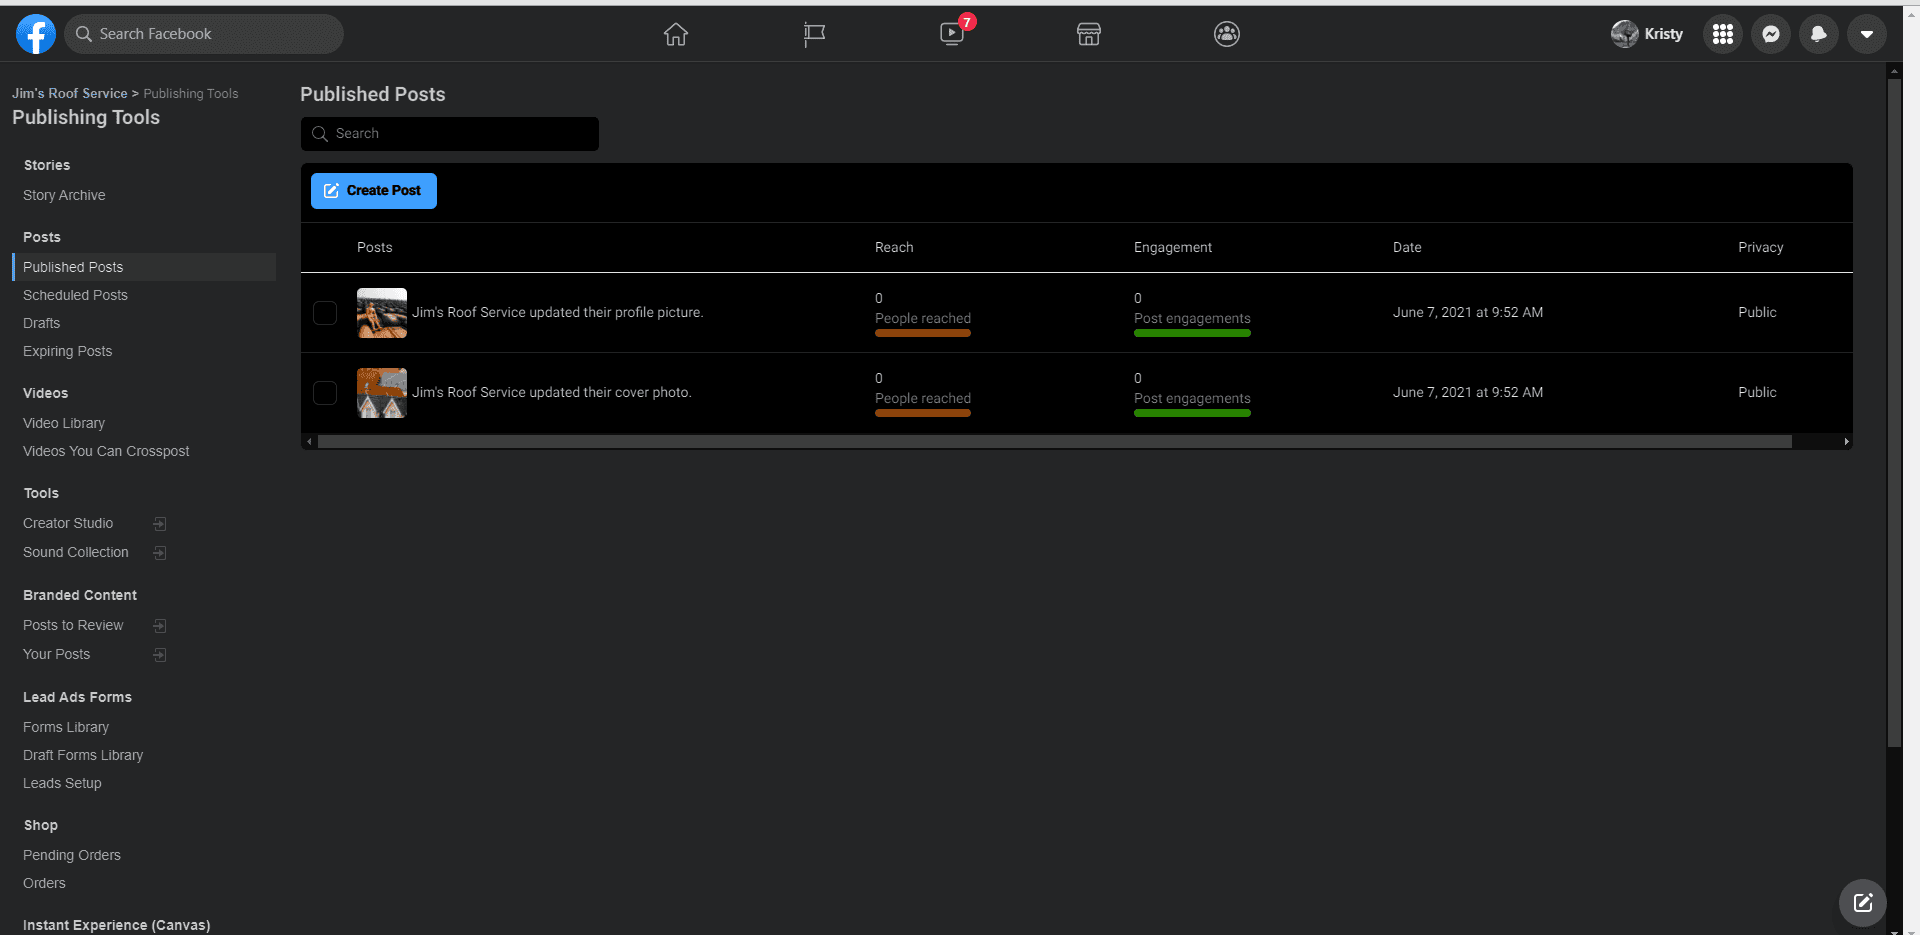
This is where you should be creating your Facebook posts most of the time. Using the Publishing Tools, you can create posts and schedule them far in advance, using tools that will help you deliver content to specific subsets of your audience. That way, instead of taking time out of your day every time you want to post, you can sit down once a week (or even once a month) and take care of it all at once.
There are a lot of features here that can be used to reach potential customers. The important part to remember is that customers are more likely to engage with posts that have pictures or videos. If you have the opportunity to share relevant content that encourages customers to engage, ask questions, or contact you, do it. Video guides that explain how to do basic at-home tasks and repairs are popular and produce very good results.
Step 4: Adding Additional Account Admins
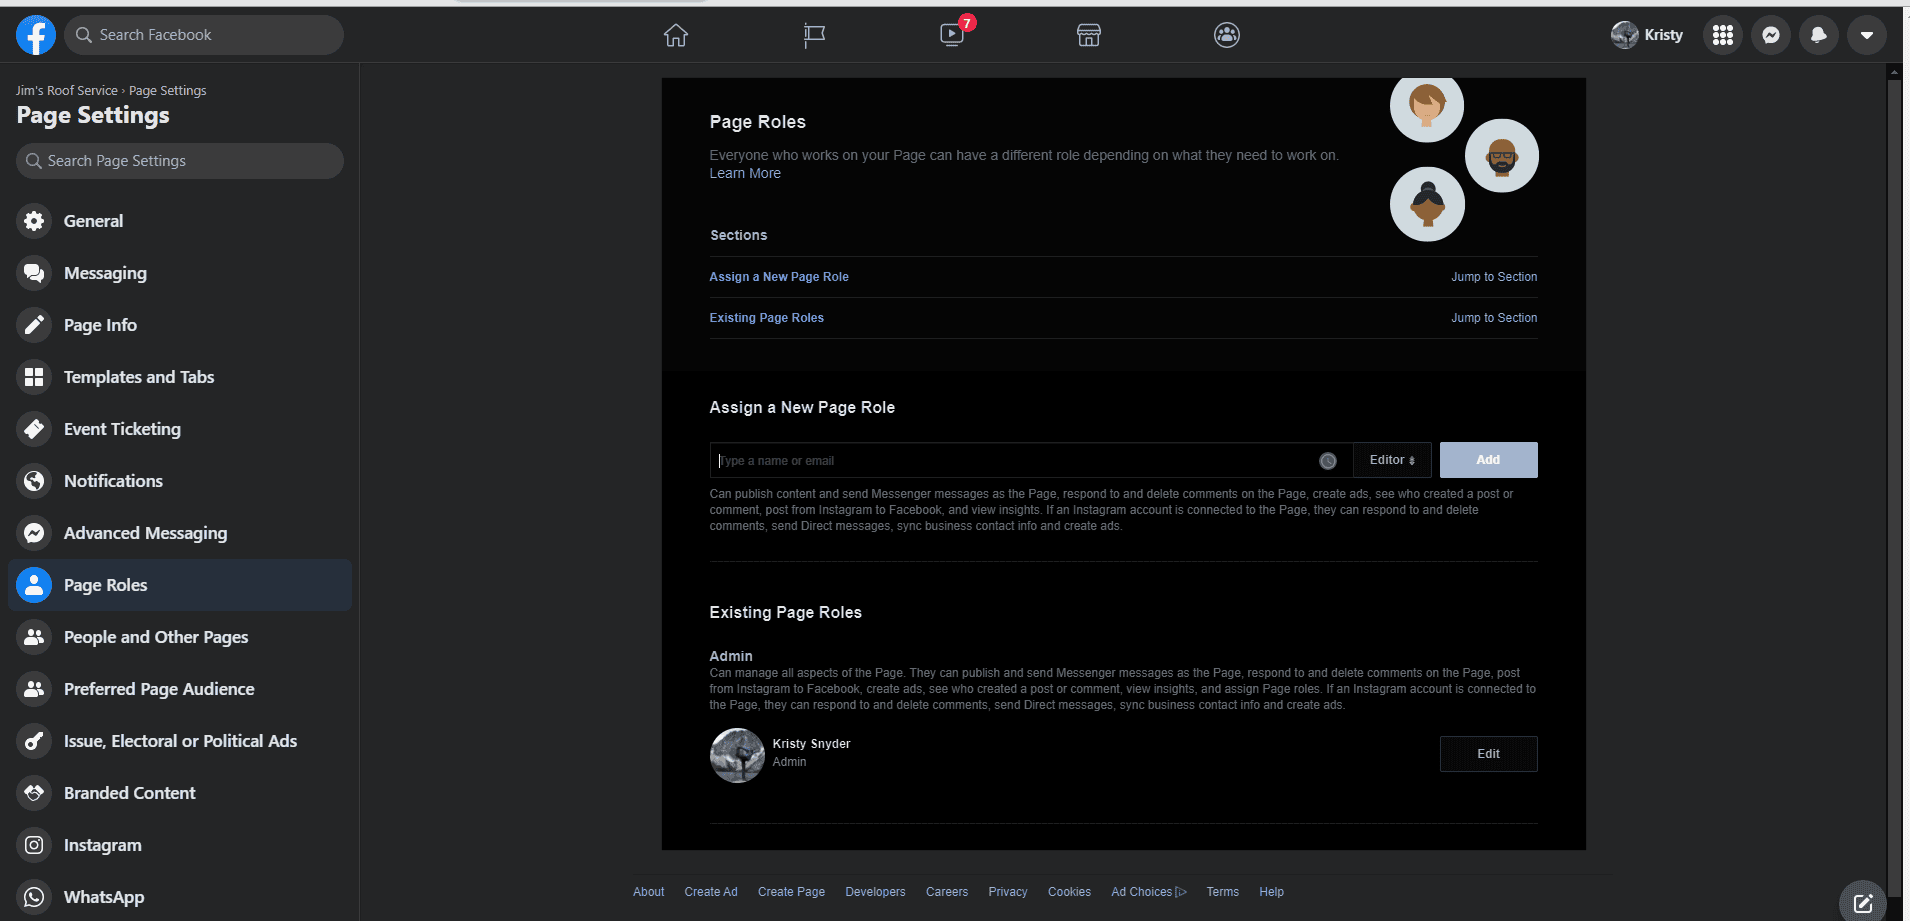
With all of this information, Facebook can seem intimidating. But it doesn’t have to be. It can take a few hours to set everything up properly the first time, but with a bit of practice, Facebook is an easy marketing tool with a rich feature set and a huge audience. The easiest way to remove the stress from Facebook marketing, of course, is to share the load. Here’s how you can add additional users to your page so your employees (or a freelance marketer) can help you manage your page:
- On your business page, click on settings (left side of the grey navigation bar).
- In the left-hand menu of the settings page, click on Page Roles.
- Under the "Assign a New Page Role" option, type in the name or email of the person you want to be an admin.
- Click Save.
When you do this, the person you add will receive a notification that they’ve been added to the business page. It’s important to talk to them beforehand, as Facebook will give them very little information about how the page works and what they’re supposed to do.
The different roles available for the page are important, as selecting the right role for each user will allow them to do what you want them to do, and prevent them from doing things you don’t want them to. The last thing you want to do is give a disgruntled employee the power to change or delete your page. Here are the descriptions of the page roles, so you can use them properly:
- Admin: Can manage all aspects of the Page including sending messages and publishing as the Page, creating ads, seeing which admin created a post or comment, viewing insights and assigning Page roles.
- Editor: Can edit the Page, send messages and publish as the Page, create ads, see which admin created a post or comment, and view insights.
- Moderator: Can respond to and delete comments on the Page, send messages as the Page, see which admin created a post or comment, create ads, and view insights.
- Advertiser: Can see which admin created a post or comment, create ads and view insights.
- Analyst: Can see which admin created a post or comment and view insights. As a rule, don’t give anyone more responsibility on your page than they need to do their job. If you’re working with a freelance or third-party marketer, don’t give them admin rights. Don’t add all of your employees to the page, and make sure you remove users who leave the company. Finding the right person to help is important, so don’t worry if it takes a while to find the person who fits in.
When you divide the burden of managing the page between two or three people, using Facebook as a marketing tool is easy. Since responding to messages is the most time-intensive task and scheduling posts is the least time-sensitive task, it’s common to assign those duties to one employee so the business owner can focus on more important things. The best role to give such an employee is the editor role.
Understanding Customer Psychology
Now that you know how to set up your page, what parts of it are important, and how to safely share the workload with your employees, it’s time to look at the psychological side of Facebook. Lots of people think that they need to spend a lot of money to reach new customers, but that isn’t always necessary.
According to a 2013 study by Syncapse, Facebook users engage with different companies for different reasons on Facebook. They engage with the Mercedes Facebook page differently than they do the Facebook page for a local band or business and understanding why they do that is an important part of marketing.
The top three reasons for engagement are to support the brand, to get a coupon or discount, and to receive regular updates from brands they like. For small business owners, those first two reasons are the most important. Don’t base your marketing strategy on large companies with highly visual products. Focus on customer satisfaction and regular access to perceived discounts.
There are tons of articles that talk about building the perfect marketing campaign, but the process is pretty simple. Post a total of 1-4 posts per week, primarily posting on Sundays and Wednesdays. Use posts that ask questions or prompt customers to ‘fill in the blank’ and include pictures or videos when possible. When posting deals or coupons, list the savings amount in dollars instead of using a percentage.
Facebook is more than just a social media platform. It’s a digital ecosystem, populated by customers, businesses, advertisers, brands and more. Integrating it into your business practices can take time, but the results are worth it. With a bit of work, some delegation, and an understanding of what your customers want, you can turn Facebook into one of the best tools in your business arsenal without buying ads.
Get More Time for Marketing With the Help of FieldPulse
You might be thinking — how will I ever have time for all this Facebook stuff? That's where FieldPulse comes into play. Our business management app lets you run your business better ever than before, drastically cutting down on the time you spend organizing files, managing customer invoices, creating job schedules and much more. You'll get rid of all the paperwork, customer management and filing tasks that take up the majority of your day so you can have more time to spend on growing your business over Facebook.
Want to learn more? Schedule a demo to see just how FieldPulse can take your trade service business to the next level.

